Motivation
Spurred on by fond memories of our adventures in Meteor Scatter earlier in 2015 at the Secret Nuclear Bunker, I set a mental note to watch the meteor showers throughout the remainder of the year. As I write this article, on the 06 December 2015, the December 13-14 Geminids are fast approaching. I’d ideally like to be able to operate during this time, but, given my work load is very intense at the present, and the weekends are likely to be busy with the SNBGC’s Christmas Party and family gatherings, I fear this won’t happen. Okay, enough of the preface…
RTL-SDR Setup and Calibration
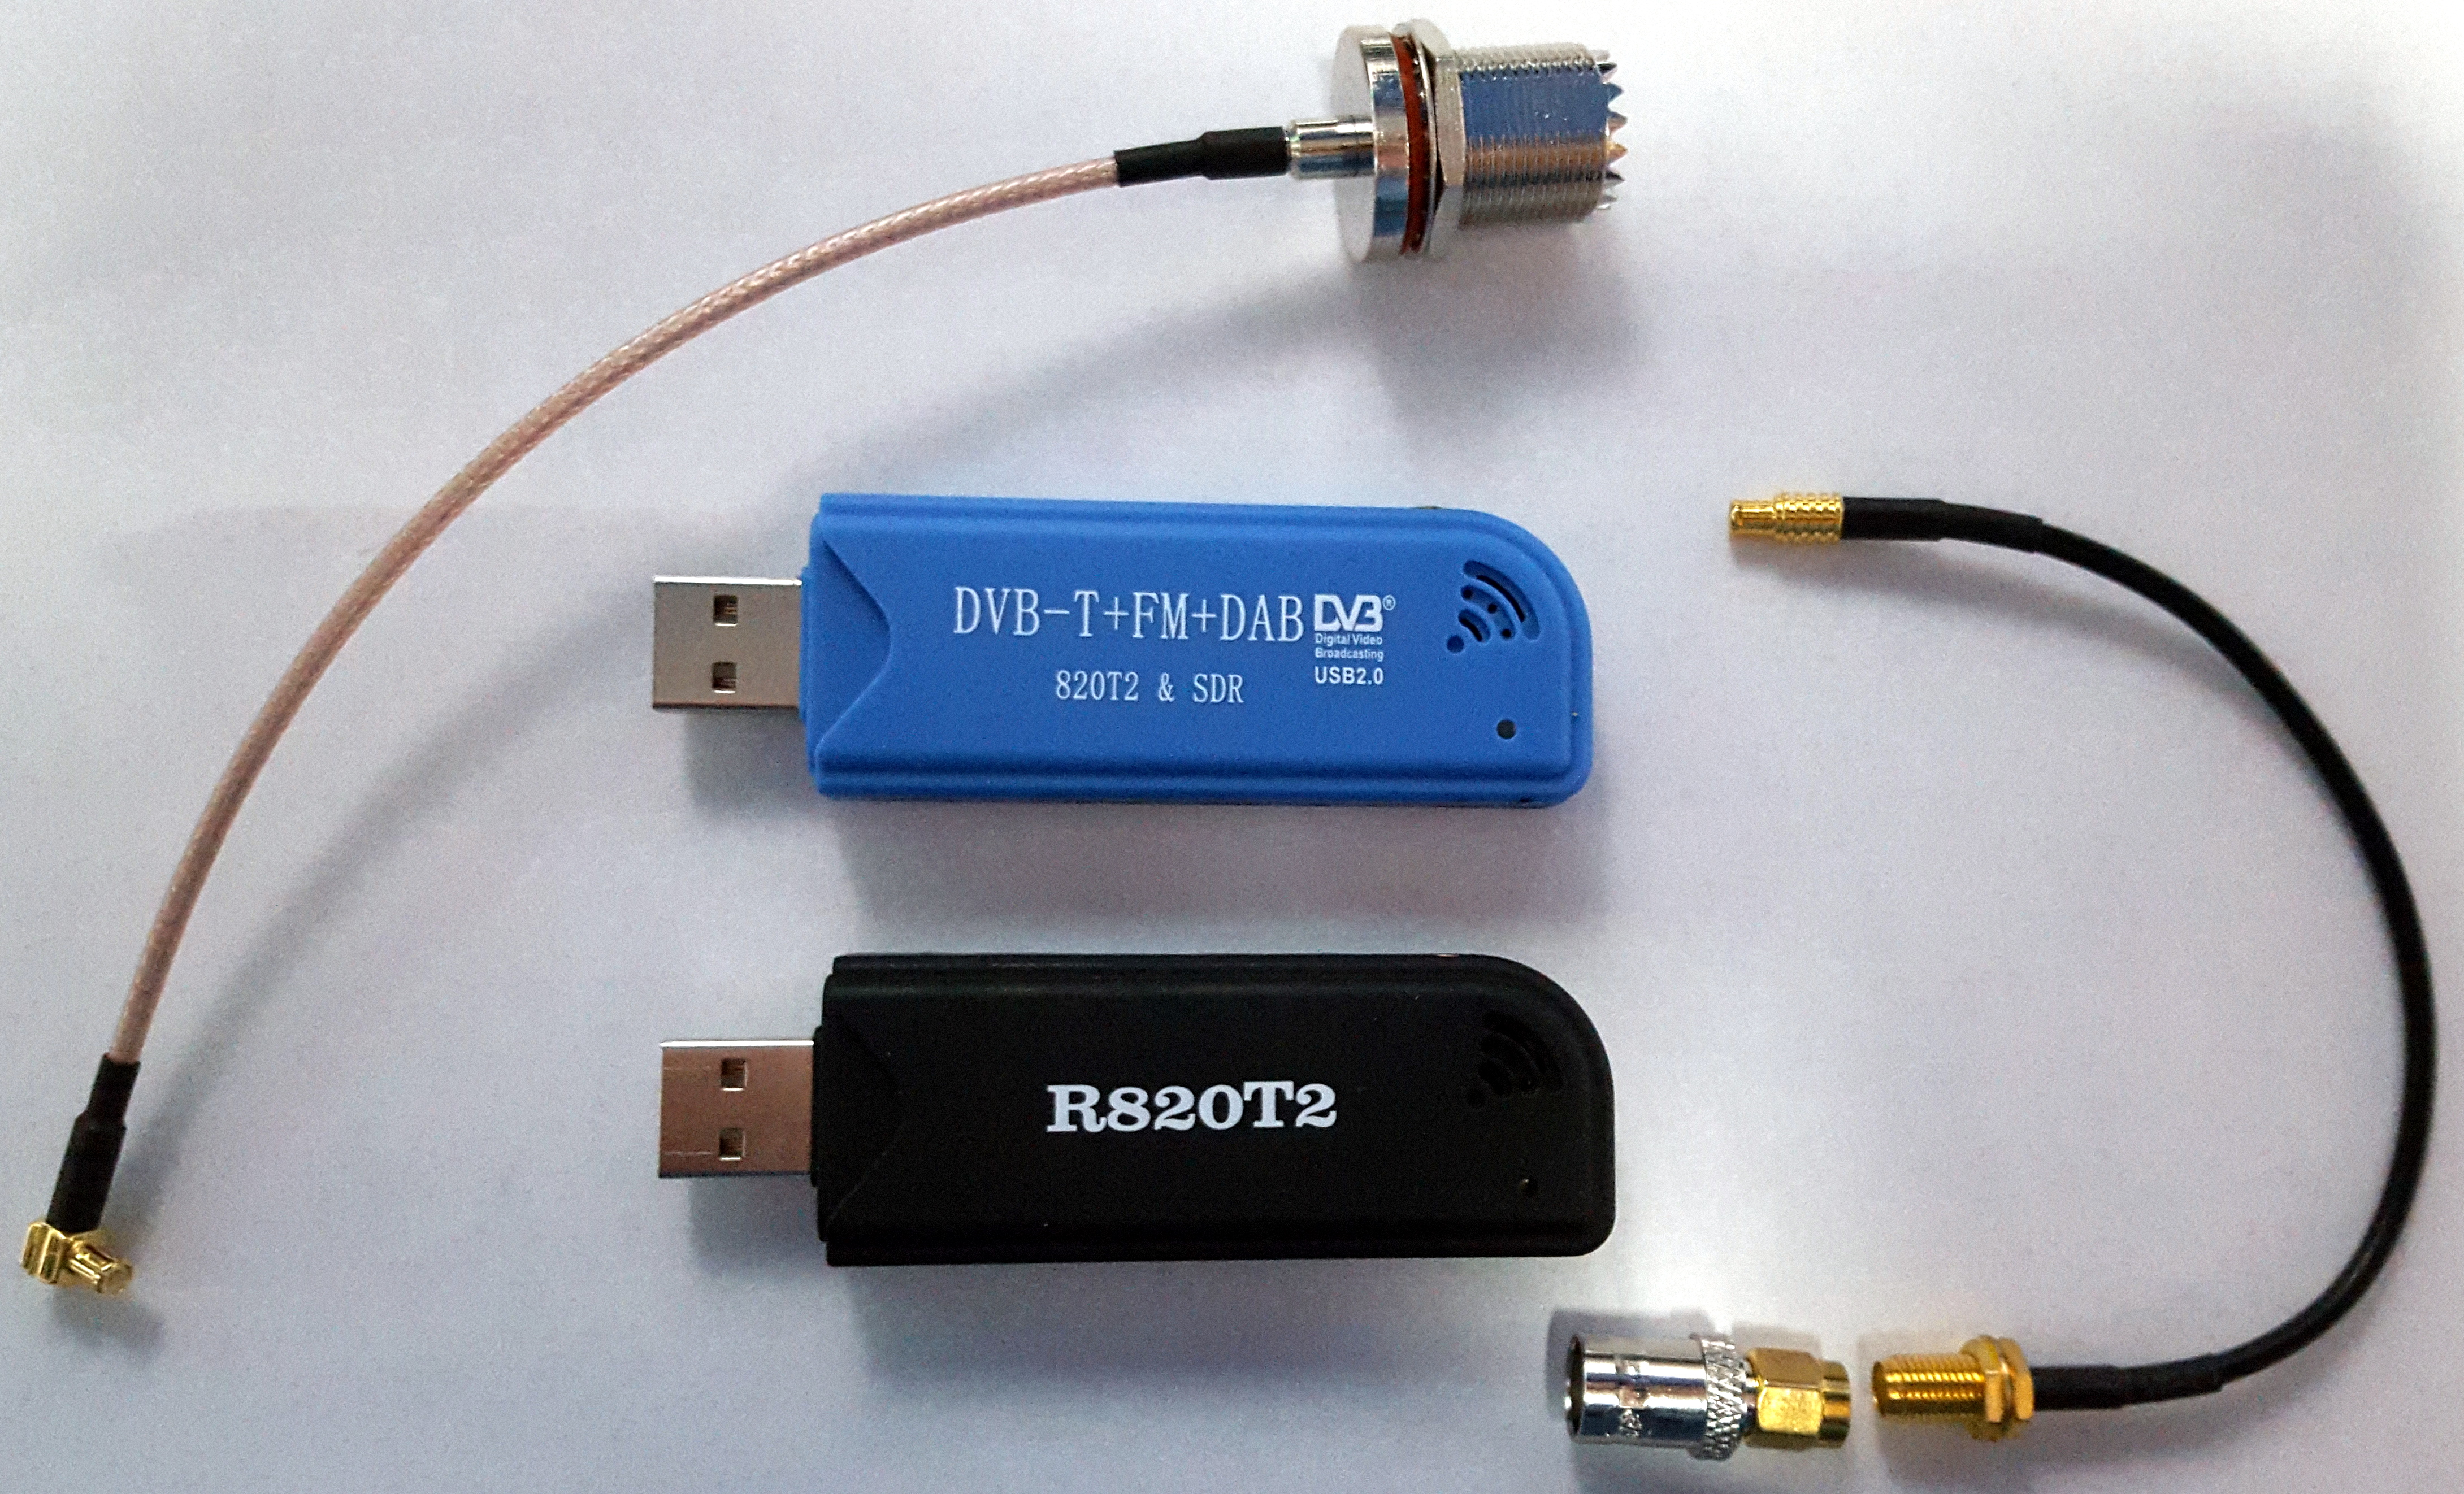
What I decided to try, was to get my RTL-SDR dongle to receive Meteor Scatter pings on the 2 metre (or any other) amateur band. FSK441 is a good bet on 144.370 MHz upper-sideband (as is convention). I wanted this to work on Linux (Xubuntu 15.04), and I really wanted to use a RTL-SDR dongle. So I decided to try in software. This saved tying up my IC7100 or ‘proper’ VHF radios.
My antenna here is a cheap and simple Diamond X30 colinear, mounted very low down, on the house wall. It’s not above the roofline, and it’s really very poor. But it does work, and it will do for testing here. I use about +20 dB of gain on the RTL-SDR. You should adjust this for the best signal to noise at your own location – I use a local repeater as a distant signal.
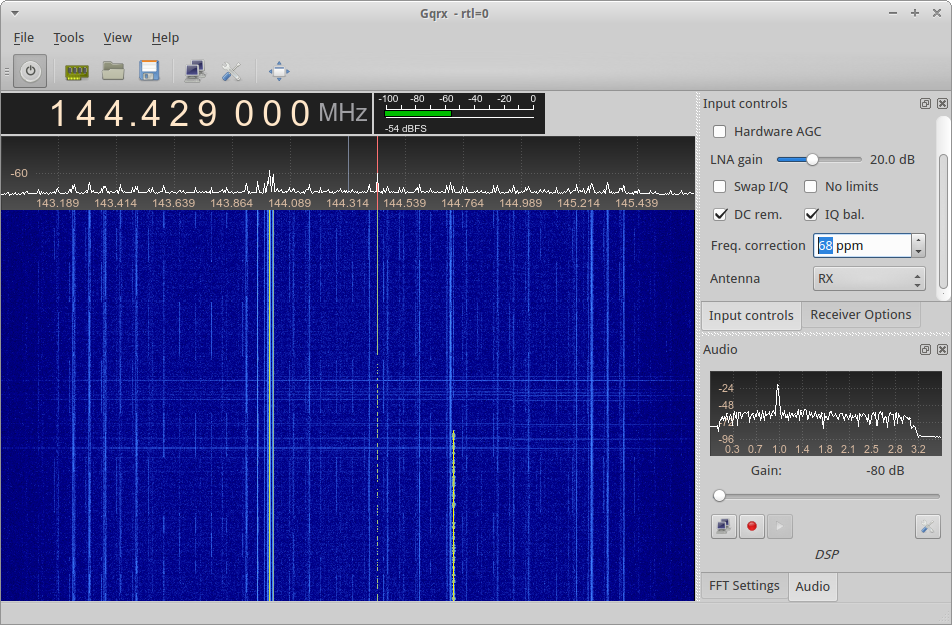
The first thing to do is get gqrx going. You can install that via the repositories, it’s called ‘gqrx-sdr’. Once you have that loaded, you need to set the calibration on the dongle. I am fortunate enough to receive GB3VHF which is GPS frequency locked.
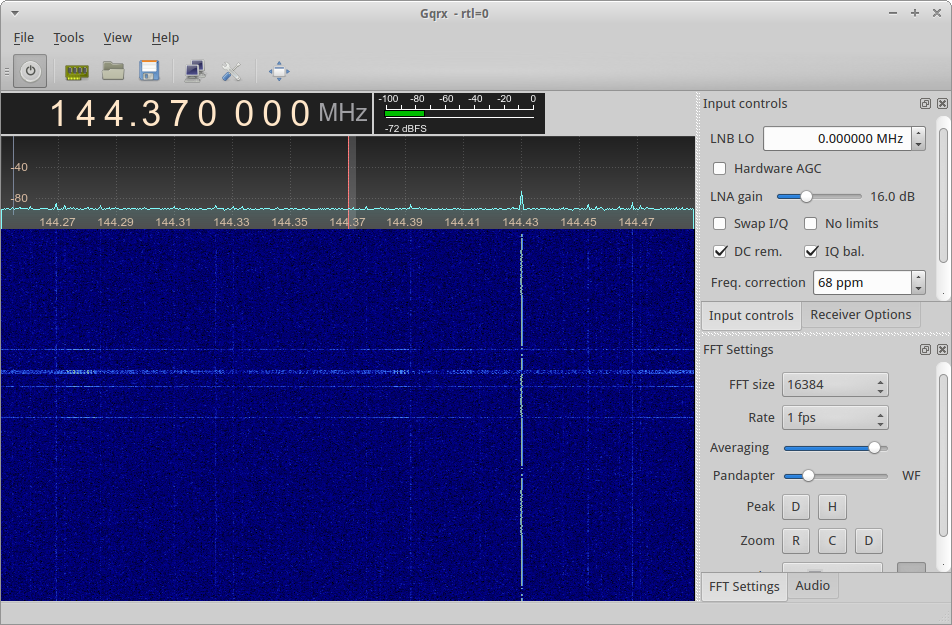
Below, what you see, is a USB dial frequency of 144.429 MHz. Knowing that GB3VHF is accurately on 144.430 MHz (for its CW ident), I am looking for an audio frequency of 1 kHz. I adjust the frequency correction (in parts per million, PPM) to give a 1 kHz audio tone in the audio FFT window (bottom right). This gives is some confidence that we’re on frequency. This should be checked a few times as the RTL-SDR dongle warms, and its reference oscillator drifts.
Once we know we’re accurately on the frequency of interest, we can then move to the Meteor Scatter frequency, 144.370 MHz USB.
Decoding Software
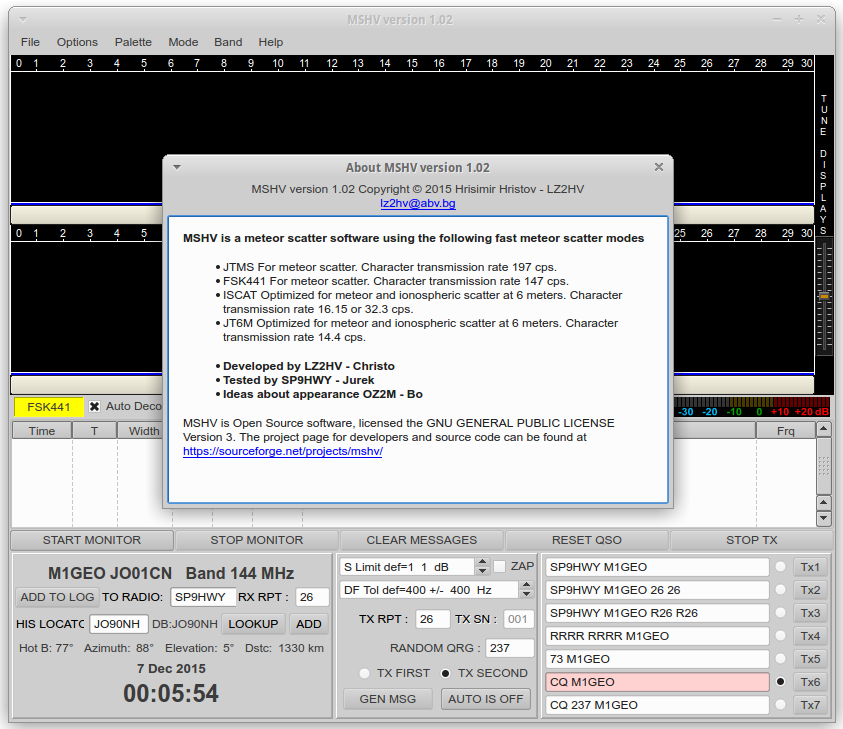
At this point, I switch to using the FSK441 software. You have a choice here. You can either use WSJT or MSHV. In my experience, I have found MSHV to perform better. For this article I am using MSHV version 1.02. As I am using Linux, I have to compile the program (which is simple) but Windows users will just be able to download the binary.
The compilation is outside the scope of this article, but in a sentence, it’s as follows: Unzip source, cd into directory, edit src/config.h for OS, edit MSHV_XXX.pro for the correct libsound location, qmake-qt4 MSHV_XXX.pro, make. (see here for more info – I used qmake-qt4 to avoid needing QPlastiqueStyle for Qt5).
Audio Linking using snd-aloop
We need a way to get the audio from the software receiver to the decoding software. Windows users should check out Virtual Audio Cable. Linux users are blessed with the free snd-aloop which does the same. The Windows software is reasonably easy to use, and not in the scope of this article.
When used, the snd-aloop kernel module will create a loopback analogue stereo device with an input and output that connect together.
You first need to tell ALSA what you want it to do with the module when it is loaded. Edit /etc/modprobe.d/alsa-base.conf, and at the end of the file, add:
options snd_xxxxxxx index=0
options snd_yyyyyyy index=1
options snd_aloop index=2
Once you have saved this, you should load the kernel module, using the following:
sudo modprobe snd-aloop
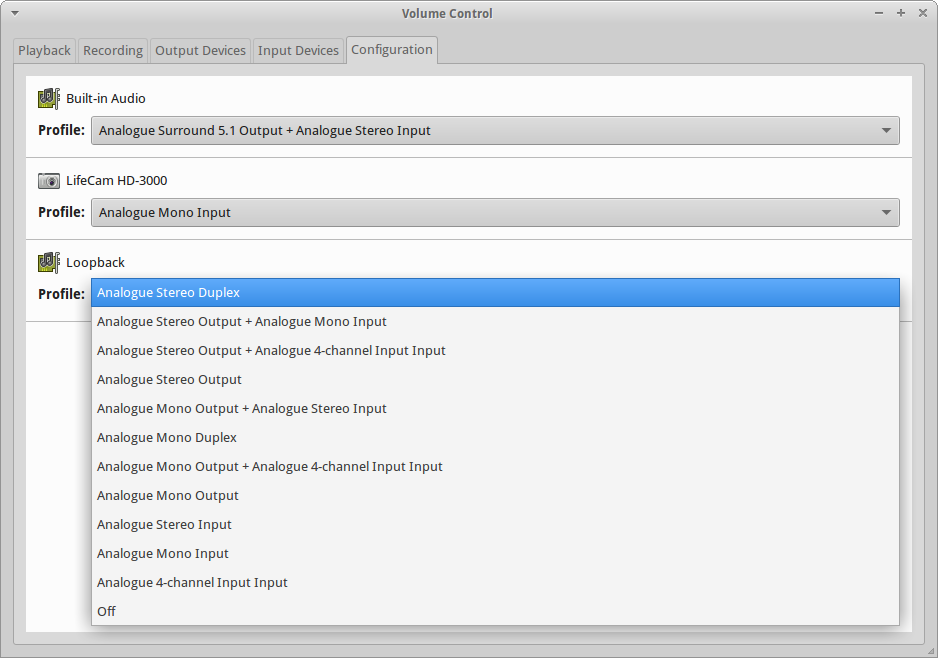
You’ll be able to see the new Loop device in the Volume Control Configuration window. We’re interested in Loopback. The other two devices (Built-in Audio, and LifeCam HD-3000) are the proper sound interfaces I use.
With the loopback interface now running, we can start to direct audio through it.
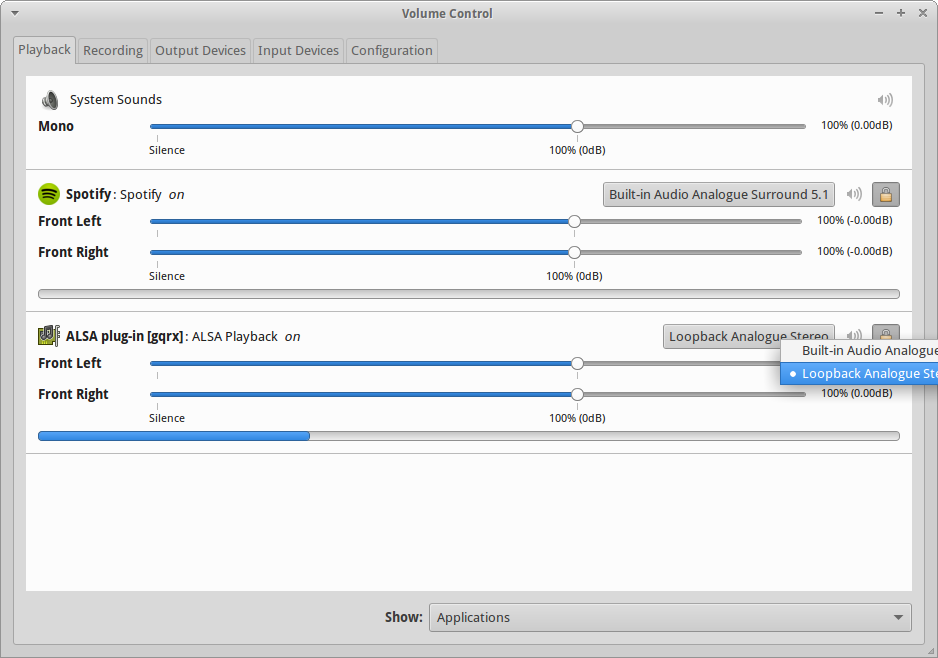
With gqrx, there is a small niggle. I cannot, no matter what I try, get the demodulated sound to output directly to the ALSA device. This is something peculiar to gqrx. However, there is a work around. With gqrx running, you can select the output device via the Volume Control. On the Playback tab, under [gqrx] you can select Loopback Analogue Stereo instead.
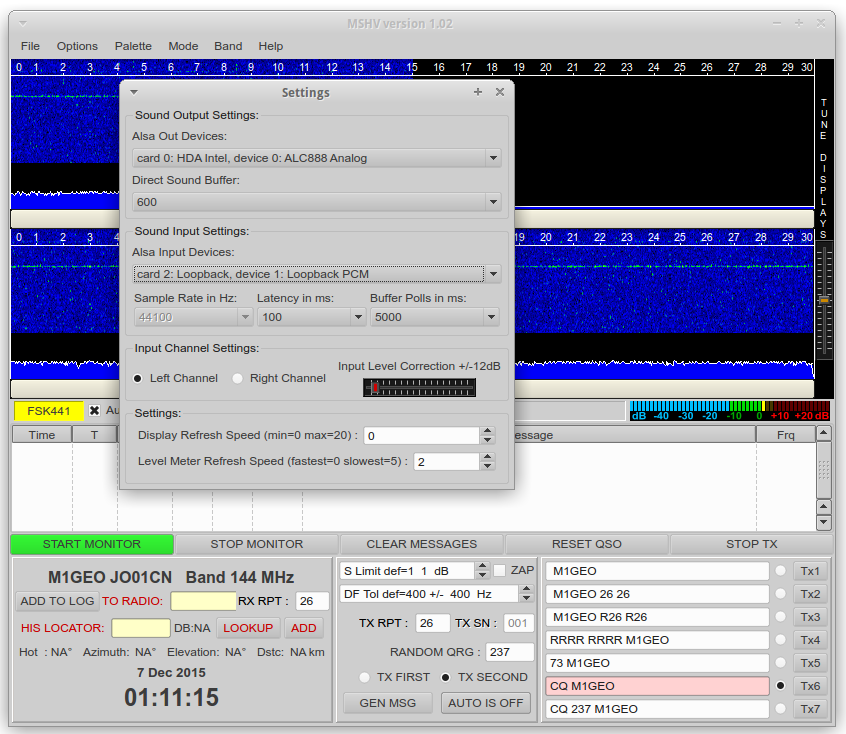
From inside the decoding software (here MSHV), you can then set the input device as the loopback device, and select the required level, as you usually would.
Receiving
And there you have it. You just need to be patient now!
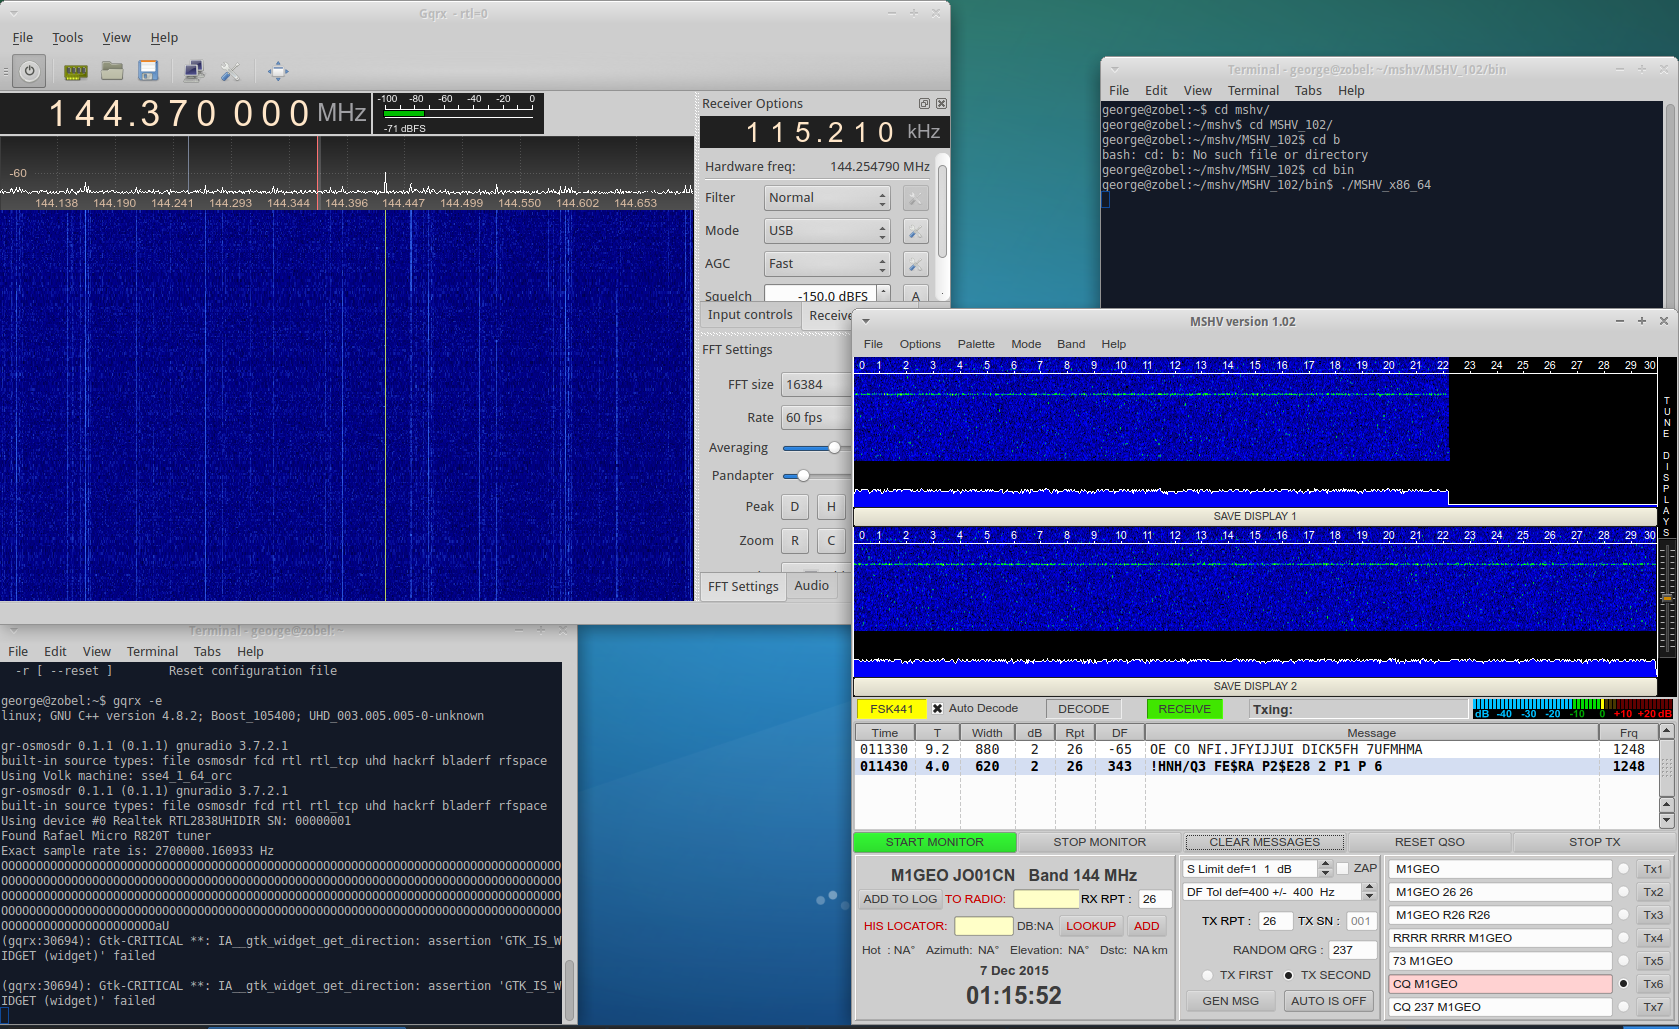
Frustratingly, a neighbouring house has a noisy thermostat on their heating system, which causes short pulses of S9+ noise, which the software confuses as being a meteor ping, and then decodes, resulting in an false decode of just junk. This is regular at home, but I suppose what I expect living in a built up part of East London. A ‘proper’ receiver is better filtered against such noise, and performs better.
The noise shows up as steps in MSHV and as a wide-band across the gqrx waterfall. The line at 144.430 MHz is GB3VHF, the wobble is JT65 that the beacon transmits.

