Introduction
I have long since played around with QRSS (and QRSS on 2 metres) as well as WSPR (and 2m WSPR). I have written code (or dabbled with):
This project was to combine a few of those modes into a multimode manned experimental propagation transmitter (MEPT). I wanted something that would transmit several modes and could be left running for a few hours. I was interested in experimenting with VHF, since most of my previous attempts had been on HF. I had played around with 2m QRSS and 2m WSPR before, but with very minimal success.
The Knights QRSS group (mailing list here) usually arrange a new-years activity evening, and so, I decided to start early this year.
The usual configuration is a machine sent callsign in dual-frequency CW, over a 10 minute stackable window. The receive station overlays 10 minute waterfall grabs, and the correlation of the signal against the randomness of noise helps to resolve the signal. I decided not to break with this standard, and keep my frames repeating exactly on the 10 minute.
Hardware Choices
I wanted frequency versatility over the HF-VHF range. Previously I had used an Analog Devices AD9851 DDS chip. This time I opted for the Si-Labs Si5351 for several reasons: a frequency range from 2.5 kHz to 200 MHz and glitchless frequency changes being the main advantages. I could then build a small power amplifier & low-pass filter to follow the board.
When I started working on the project, Jason NT7S was working on a breakout board for the Si5351. This was originally a crowd-funded project, which has since been spun out. The board I have is an early revision. I originally used the supplied TCXO from Jason, but this was found to be unsatisfactory – the temperature compensation steps resulted in jumps of around 2 Hz at 144 MHz, which is in the order of magnitude of modulation on QRSS. I ended up using a 25 MHz oscillator block in an old Pye Communications crystal oven.
Another option is the Arduino shield by KangaProducts. I was donated an early development version of the superbly convenient m0xpd Si5351A Arduino Shield to beta test. This shield exceeded my expectations in terms of functionality with the on-board amplifiers, and the convenience of the Arduino shield. The shield worked better on HF than VHF, because the on-board oscillator was prone to thermal drift and the ferrites seemed a little lossy on VHF.
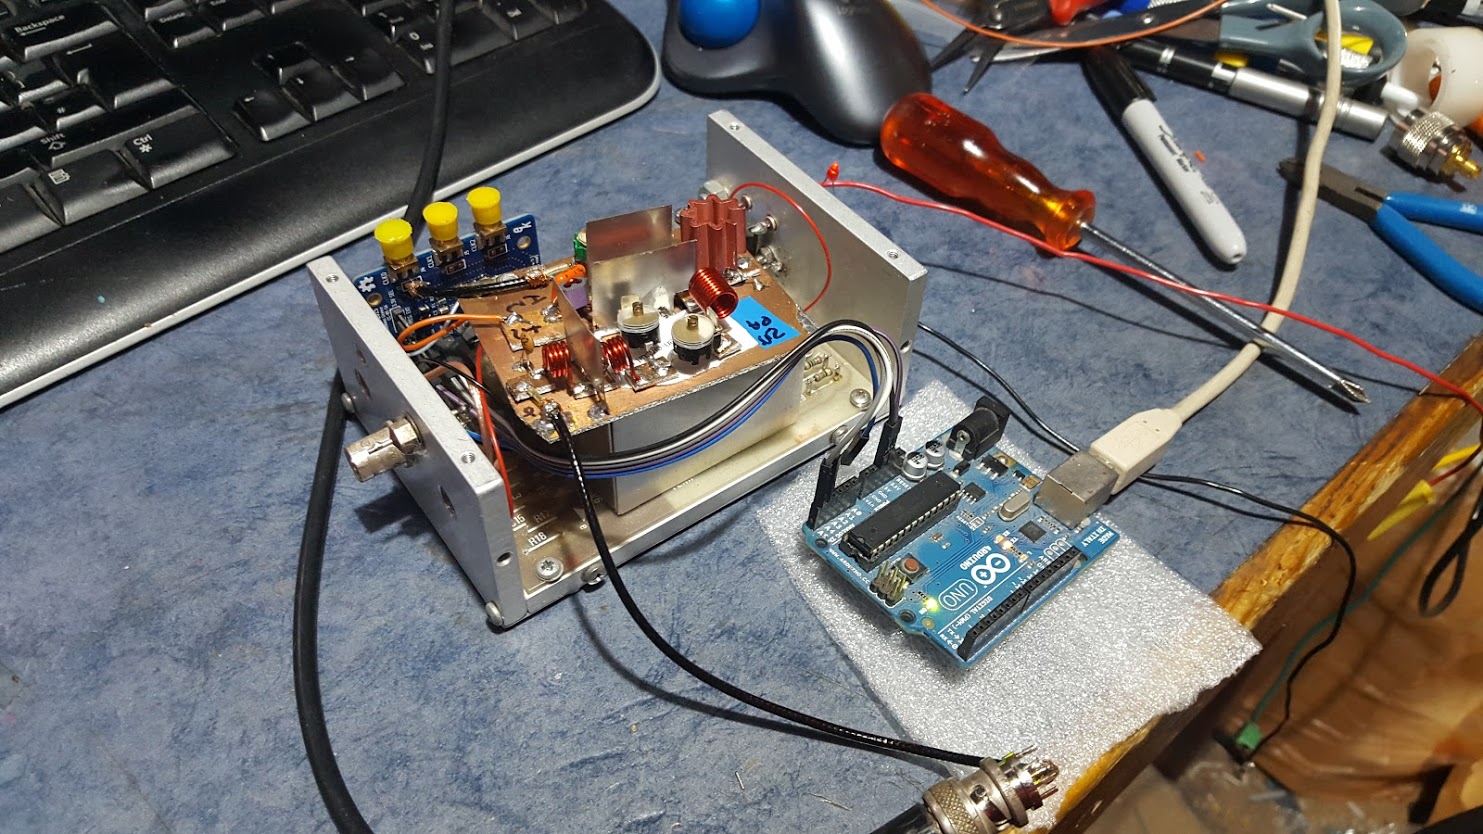
I repurposed a PA and LPF for 144 MHz, and started building. The rather Frankenstein contraption is shown below:
Software
I used an Arduino controller, and pulled in standard libraries to glue together for the basic functionality. You’re advised to look at the list above if you’re interested in a single mode. The basic Si5351 driver was written by Jason NT7S, and can be found here: github.com/etherkit/Si5351Arduino.
I then glued the code to support other modes around the Si5351 driver. These modes are expanded on below.
SMT HELL
Sequential Multitone Hellschreiber (SMT HELL) is a technique for “drawing” or “writing” in the frequency domain. It can often be seen on waterfalls when using PSK31, when people will send “73” or “CQ”. The text is then “rendered” by sequentially scanning through frequencies in time, and either transmitting a carrier or not. The carrier shows up visible on the receiving station’s waterfall. Some more information can be found on this, here.
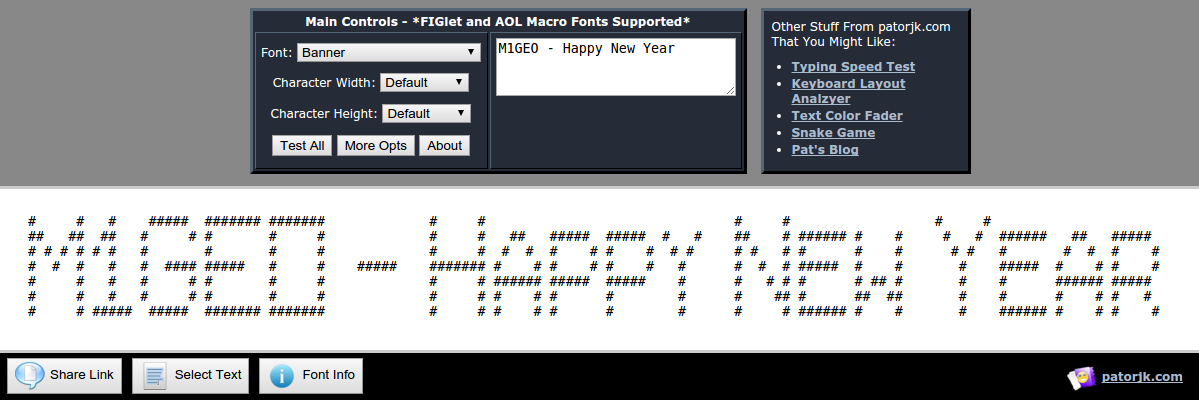
To generate this, we first need to get the text we wish to send. You need to make a low-resolution bitmap of the text or image you wish to send. I used patorjk.com Text Ascii-Art Generator with the Banner font to create the following.
I then use console tools to convert this into a bitmap. If you are using an operating system with Bash and coreutils, you can use cut, paste, head and tail to mangle the data. The net aim is to arrange the text vertically, with the # represented by 1 and the spaces as 0. Then, we can make each column (as above, which is transposed into rows) into a byte. Save the text as /tmp/qrss
for A in `seq 1 8`; do echo “Proc $A”; cat /tmp/qrss | head -n $A | tail -n 1 | sed ‘s/\(.\)/\1\n/g’ > /tmp/qrss${A}; done
paste -d “” /tmp/qrss1 /tmp/qrss2 /tmp/qrss3 /tmp/qrss4 /tmp/qrss5 /tmp/qrss6 /tmp/qrss7 /tmp/qrss8 > /tmp/qrss_new
cat qrss_new | sed -e “s/#/1/g” -e “s/ /0/g” -e “s/^/B/” -e “s/$/,/”
rm /tmp/qrss*
A this point, you’ll have a nice block of binary, ready to be inserted into an array. Beginning with B and ending with a comma. Here’s chunk (it’s an M).
B1111111,
B0100000,
B0010000,
B0001000,
B0010000,
B0100000,
B1111111,
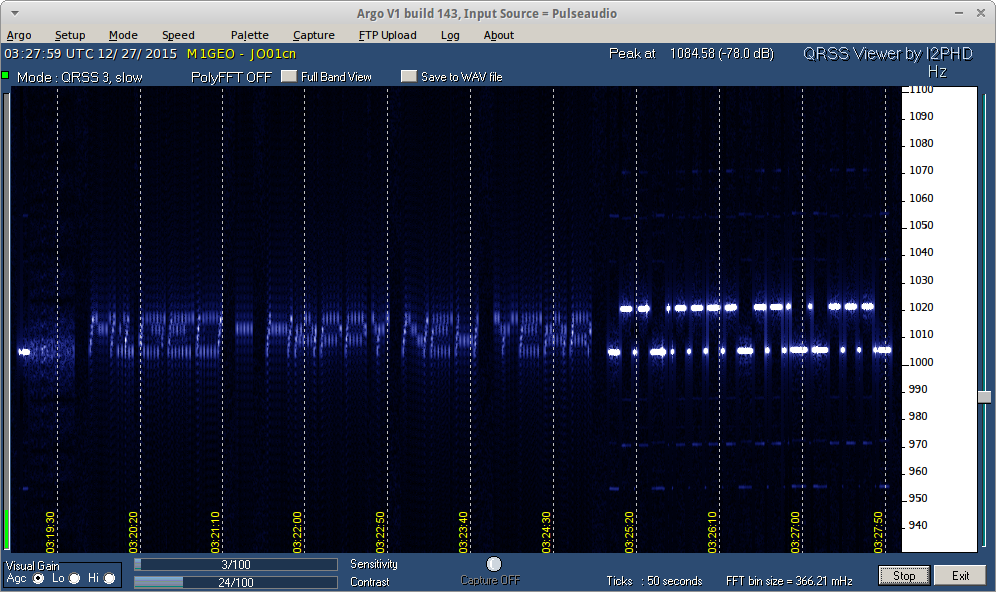
This is inserted into the Arduino code. When run, the result looks something like the following:
Image taken using Argo by I2PHD.
QRSS & CW
For the Morse code and QRSS (very slow, dual frequency Morse), a simple, reusable, routine was written that sends dots and dashes in either ASK (on/off pulses) or FSK (frequency changes). It also sends at a human readable speed (approx 20 words per minute) or at the QRSS rate of 3 second dits.
The message to be sent is input in dots and dashes, and can be converted with an online Morse code translator.
The output QRSS looks something like the following.
The next job is to play around with the exact timing of the QRSS and SMT HELL. I currently have 81754 milliseconds of free time available. Ideally, shortening the HELL time slightly to leave 2 minutes would allow for sending a WSPR frame too. Another option would be to remove the CW in the beginning, which would allow just enough time.
The above screen shows Argo with running under Wine, with 3-second ticks QRSS in slow mode.
More to come!


